XML-modding
What can I do with the Locotool?
Basics
To make it able to be coupled to every place of the train
Prevent the turn of the second locomotive
Change the sound
Two different signal horns
Change the freight
From the tracks to the street
From the tracks to the tram
At the End return to the DAT
Information:
Befor changing a DAT, always make a copy first.
What is a XML?
A .dat always consists of the graphs and data. These are represented by the decode as XML. XML is Extensible Markup Language. It is the way data system independent in their hierarchical form to show as a text file.
As a simple XML already has several hundreds of lines, I explain below the building, and some ways to modify data without which there are problems with Locomotion.
What can I do with the Locotool?
Even if the Locotool is one .exe, this is not installed. When you try you
get an error message or the review by Joseph Drexel.
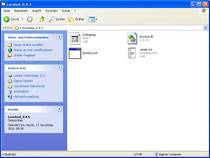
Instead, these files are stored in a separate folder in one
easy-to-find place
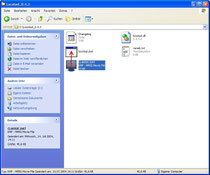
First you move the .dat-file that you want to change in this folder. Then you hold the left mouse button and moves the file to or over the Locotool.
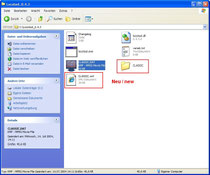
Now the file is read and a few moments later you have next to the .dat, the same XML and also so designated folder containing the graphics
Basics
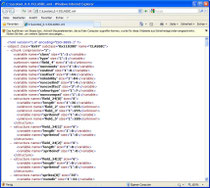
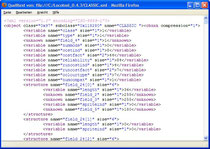
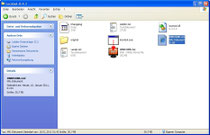
The XML open standard with any popular browser. This looks then like in the picture. But here you can still change nothing.
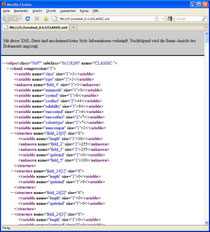
This is how it look for Mozilla Firefox.
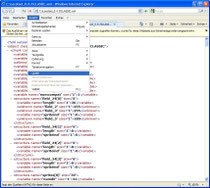

If you now to the Microsoft Internet Explorer, click on "View - Source" button, you get an editor window with the contents of XML. Here you can change things now.
You may, however, do not close the browser window. Also, you can now delete the old .dat-file, or secure what you have been opened. Instead, we create a new after.
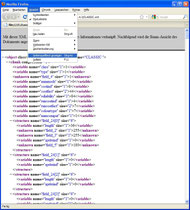
In Mozilla Firefox you'll have to click on "View - Open Source".
Here, too you may not close the browser, but you can already delete the old .dat-file, or secure.
I will now only explain everything as Microsoft Internet Explorer. But the process is the same.
To make it able to be coupled to every place of the train
If you are a locomotive, of whatever kind, have built, we can only put this at the beginning and end of a train. Trying to bring
it back in the game forward, they will always slide to the rear and at an even number of cars also used the wrong way.
We want to change herewith.

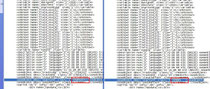
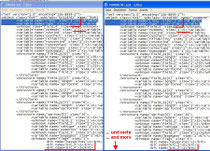
Actually this is quite simple. Deletes only the blue lines marked out here. Then you can save and convert back. Look here
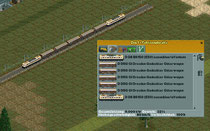
The result will look like on the adjacent picture is seen. You can now the second locomotive placed anywhere within the train.
Prevent the turn of the second locomotive

Now, if you run multiple trains depends in a
row, the second locomotive is always wrong stand
around. Also you can change.
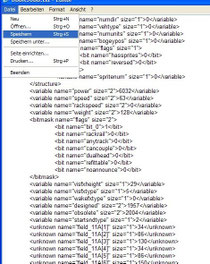
Where you just the three lines have been
deleted, still stands as the first blue highlighted
line. Now change the 1 to a 0. Alternatively,
you can also delete the line completely.

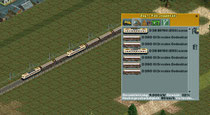
It then looks like the picture next to it.
Change the sound
I explain here how first you only one standard sound by another standard sound replaces already existing in the game. Same thing with sound files which were created by you or another user. The parameters to be found but in lengthy tests.
This is not an invitation or release the sounds of robinH and me to use without permission.
Search the file where you want the sound is in there and make from the editor view a text file. It will let you search for the appropriate section discretion quickly.
Then you open the file where it will enter in the editor view. The section with the sound settings located over the vehicle designations. Is so easy to find.
Then you will copy the selected lines,
shown in blue, in the appropriate place in the desired vehicle.
The line with the "startsndtype" copies if you should change the value.
In the end your still looking at the vehicle designations the line with the "startsnd". This entry is also
copied to the desired vehicle.
Finish. Now just save (not "save as ...."), all close, creating the DAT (see last section
of this tutorial) and move into the ObjData folder.
Important:
The vehicle MUST be removed and re-selected in the scenario editor. Otherwise you only hear one squeak, roar or growl.
Therefore, this guide is NOT suitable for savegames.
Two different signal horns

It is possible that when you start driving or
at railroad crossings listening two different horns .
Examined directly on the vehicle description, the line "numsnd". There is normally inside a 1. Change this value to 130
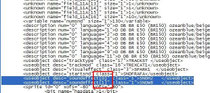
Then you are looking further down the line with the name "sound effect". Copies of these and adds
them below again.
The top is now the signal horn at drive on and the bottom at level crossings. So that the system can distinguish the must immediately after the word "sound effect" immediately set a 0 up and a 1 down in the square brackets.
If you are selecting different horns, now that looks like the picture on the left. The important thing is that it gives (with spaces) 8 characters again.
Change the freight
There are few vehicles on the original with several different types of cargo. This can be accomplished only by manual intervention.
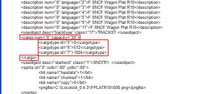
On the left you will see a list of an already modified freight wagons.
First comes the opener <cargo with the amount and the second >.
Then come the types of cargo. In this case paper, steel and timber. For every other type of freight beyond a doubled
digit is entered. Now what would happen, it would have increased number 2048, then 4096, etc.
In the end, must in any case again the </cargo> stand. Thus, this
area is completed.
But beware: So you can only carry paper or
steel or timber!
(Side note:
But this assumes that you have taken the appropriate graphics
for each cargo. However, if you for example have
a flat car with only one charge, but allow several types of cargo, it is necessary that
you instead of the 512 etc. also writte a 0.)
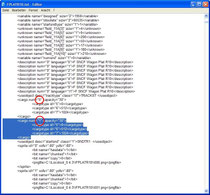
You can increase the load capacity only
up to 255 tons. If you want to simultaneously
carry more or different goods have to open
it a second slot. Copied to you all three areas outlined in red on top and
underneath is the bottom again. It will look like on the picture to see the right.
The only and most important difference is 0 or 1 at the beginning.
Now the car transported each 2x 30 tons of paper or steel or timber.
The upper limit is therefore per car with 2 x 255 tons or passengers, because it may be occupied only two slots with the same IDs.
A hint: an animated freight cars should be assigned only one slot, as this could lead to errors in the animation.
Below I offer now the ID-list for download. This ID is then entered into the appropriate field.
Or you look in the Wiki from Locomotion-Fanpage.
https://www.wisim-welt.de/lexicon/index.php?entry/24-fracht-id/
The vehicle in the picture above is the ID of 5,6 and 7. But if you now e.g. 12 extends are automatically transported with this freight car even passengers. This is of course nonsense, and you should always investigate whether the cargo can be transported in real life with this vehicle.
From the tracks to the street
With the Vehicle Creator can be built only rail vehicles. Therefore, it is necessary to modify manually if trucks, buses and aircraft specific data in the XML.
The most important advance. There are now needed instead of 136 images 208 images. Therefore, the images created as a narrow-track vehicle! That makes her already in the program MSTS2loco.
Before I started, I had been a DAT, which I know is it a truck, disassembled and saved the editor view as a .txt file. Therefore, I can now easily access this file and keep next to the edit view where I want to change something.
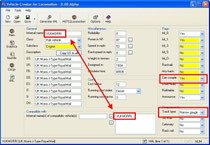
The vehicle can be created as normal with the Vehicle Creator.
If it is a truck without a trailer, you writes the internal name in the box where the vehicle normally goes in which it can be coupled. You must just remember to "Can couple" a "Yes" to set. This will prevent that it is coupled with anything.
I also recommend this type of track on the "narrow gauge" to set.

The values in the image are based on experience. Thus, the exhaust cloud comes back from the exhaust.
Then you can generate the xml and can save them. But don't produce the .dat. Before that needs to be some changes in the xml.
Now open the saved text file with the truck
(in this case GTRUCK4.txt). Then you open
the xml of the newly created vehicle, and calls on
the editor.
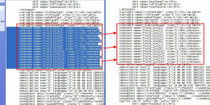
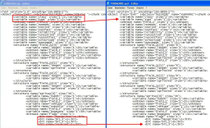
When comparing the two documents side by side, one can
see the differences. Only the red marked areas you
can now copy and transferred to the new vehicle.

Also in the field for speed and performance needs to delete some (green) or exchanged (red).
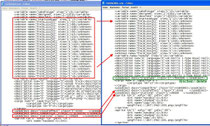
Finally, even replaced the sound and, most importantly, removed the track type.
From the tracks to the tram
Like the road car also 208 images are required, because road vehicles and trams are just as narrow-gauge vehicles two slopes. Therefore you must make sure to start 208 images. Simply set the hook purely in MSTS2loco for narrow-gauge car.

Next, I created myself from the original file "TRAM1.dat" an xml and have display them in Notepad. I have then saved as a text file and therefore can always fall back on it for comparison.
As with the road vehicles it now compares the generated xml in comparison with this file line by line. Changes everything is different and saves at the end.
One comment:
The tram should not exceed 10 meters in length, because otherwise obscured in a triangle, the vehicle stops. Why is this so I can not say.
At the end return to the DAT
After you've changed everything what you want, you click on "File" -> "Save" (not "save as ...."). You can now close the Notepad window and the browser window.
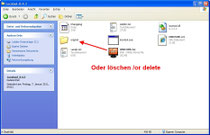
IMPORTANT:
The original file should already be deleted or moved. If not, it does now.
(In case you forgot this, a .bak-file is created. This is an automatic backup of the previous version. These so you can safely delete. But now can no longer be so easily change your undo!)
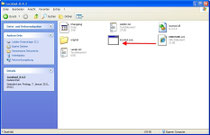
Then you move the XML back over the Locotool and only a few moments later, your new DAT will appear.
This you can now copy or move the ObjData-folder. Then, of course, tested it all looks like in Locomotion.